

Steps to Make Spring Cleaning a Breeze!

Start with Pre Spring Cleaning Tasks
Why pre-cleaning matters:
Don't get discouraged… there are “layers” of clean- you have to clear the clutter, put things in their home, THEN you can deep clean.
Keep momentum- seeing immediate progress is satisfying and will keep you going
Segments the tasks and lets you work on it over days or weeks
Makes things/ systems easier to maintain
1. Make A Checklist & Prepare Your Supplies
Make a plan of what you’re going to do and when. Break up the steps as small as you need to make it doable for you. This may mean you plan a full weekend to do this or it may mean you do one task a night for several weeks. There’s no right or wrong way to do this, just make a realistic plan for whatever you’re able to handle.
Take stock of your cleaning supplies. Pick up extra glass cleaner or bathroom cleaner if you’re close to being out. Running out once you’re in the middle of the cleaning process will slow you down and stop momentum.

2. Declutter Your Home
Go through your belongings and remove what you haven’t used in the last 6-12 months. Start in one room of the house and move down the hallway or around the house.
Bedrooms , Clothing
Bathrooms , Products & Towels
Books, Movies & Games from Living Room Areas
Throw pillows, blankets, decor from Living Room Areas
Toys & Books in Play Areas
Dishware, Decor, Etc. from Dining Room Areas
Food Storage in Pantry, Kitchen Cabinets, & Other Shelves & Drawers
Dishes, Bakeware, & Kitchen Accessories in Drawers & Cabinets
Pro tip: Donate immediately. This will help you feel accomplished because you’re clearing things OUT of your home, not just moving it around.
If you’re saving clothes from an older child for a younger child, designate a home for it right away, even if it’s a tote in the basement or storage room. Be sure to label the tote right away so the items don’t get lost in the shuffle. Extra sticky Post-It notes are great for this if you don’t want to spend time making fancy labels.
Pro tip: Keep moving! Don’t let perfection get in the way of progress. (Don’t stop decluttering to spend 5 hours on pretty labels. You can always work on the labels all at once at the end to save time and keep momentum).
If you’re saving raggedy washcloths or towels for work rags, give them a home immediately wherever you’ll use them- in their own basket in the linen closet or in a tub in the garage.

3. Clear Junk Drawers
As a part of decluttering your spaces, declutter your drawers! Remove everything from each drawer (if you have multiple junk drawers) and start sorting. If an item doesn’t already have a home somewhere else in your house, then toss it or create a home for it - especially if you see value in keeping it and you have multiples.
Pro Tip: Keep a “Donate” box or bin in your laundry room or garage. When you come across items you have multiples of, put the one you’re willing to part with immediately into the Donate Bin. Plan on emptying it out and dropping off at Goodwill or somewhere regularly. Pro Tip: pack these items in a brown paper bag from the grocery store for drop off. You won’t have to worry about trying to keep your container (or even worse… someone in your household seeing something in the bin and removing it).
4. Clean Your Fridge & Freezer
Now is a great opportunity to go through your fridge and freezer to remove all the things your family has forgotten and to organize what’s left in zones. This process is easier if you meal plan for a couple of weeks using what’s in the freezer and refrigerator. (An empty freezer is easier to defrost than a full one).
If your deep freezer has developed frost, take anything out and put in another freezer or cooler, unplug and tip forward toward a drain and/ or utility towels that can soak up the moisture as the frost melts. Wipe out thoroughly with a disinfectant. Once dry, refill with designated zones for different types of foods.
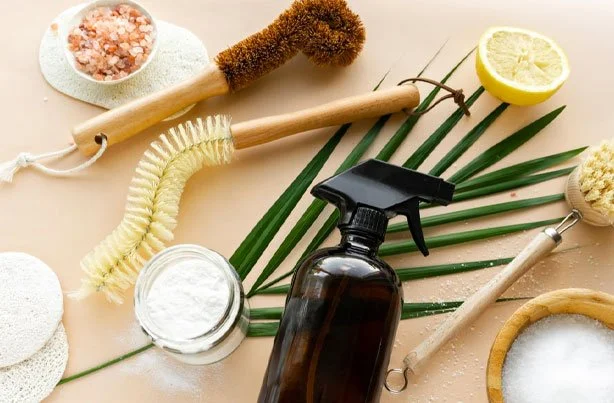
Supplies Needed for Spring Cleaning
Microfiber cloths (washable or disposable)
Extender duster/ swiffer to get hard to reach places like the tops of windows and ceiling fans
Paper towels (there will probably be some messes you want to just straight get rid of)
Trash bags
Disinfectant spray
Glass cleaner
Bathroom cleaners
Grout cleaner
Cooktop cleaner and oven cleaner
All purpose spray
Vacuum, sweeper, and/ or broom with dustpan
Wet mop with disinfectant cleaner

DIY Oven Cleaner (& Stove Top Cleaner)
What you’ll need:
Spray bottle, distilled white vinegar, tap water, baking soda, dish soap, sponge with a rough side.
In a spray bottle: mix half distilled white vinegar and water with a teaspoon of dish soap.
Spray the entire inside of the oven with the above mixture.
Sprinkle baking soda over the water vinegar mixture. Distribute a few droplets of dish soap over the area.
Let it all sit for about 10 minutes to soak and loosen hard food bits.
Scrub with the rough side of a sponge, then rinse with water, using a bowl of water and a sponge.
Spring Cleaning
Go room by room or by type of task- clean from high to low so that as dirt falls (from ceiling fans, for instance), it’ll get cleaned up in later tasks (dusting baseboards, vacuuming, mopping)
Wipe down all ceiling fixtures (don’t forget the ceiling fans!)
Wipe down the top of cabinets, tall windows, tops of refrigerators, etc.
Clear off and wipe down all open shelving
Wipe down doors
Wipe down all window tops, window sills, and baseboards
Pull down curtains and wash, dry, and replace
Wash windows inside & out
Wipe down all appliances and clear out and wipe out with a disinfectant
Wash, dry, and replace all shower curtains and wash or replace interior lining
Clear drains.
Wipe down all furniture (use a wood conditioner and cleaner on antique pieces, leather conditioner on recliners, couches)
Wash bedding, curtains, and other textiles
Wipe off outdoor furniture & replace anything that didn’t survive winter
Scrub all tile & grout, using a bleach product or mildew killer if necessary
Vacuum and mop
Are you ready to start spring cleaning? With SOUL EASE Professional Organizing by your side, you'll have your home clean and clutter-free in no time. Ready, set, go!
SOUL EASE Professional Organizing provides assistance to those looking for a clean up this spring with their services.